

Easy No-Bake Greek Yogurt Jello Cheesecake
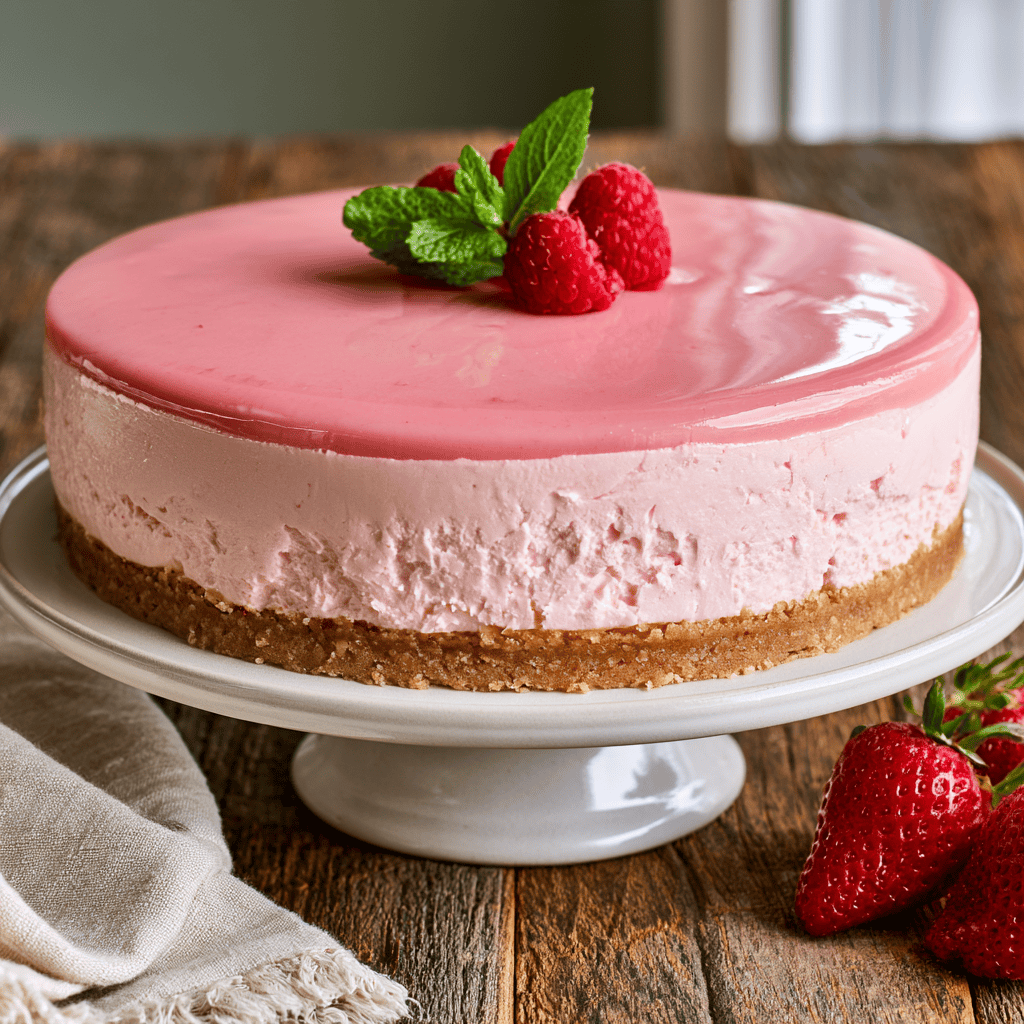
Golden and crispy on the outside, this velvety treat redefines what a quick dessert can be. When the craving for something sweet hits, you do not need to spend hours over a hot oven to satisfy it. This Easy No-Bake Greek Yogurt Jello Cheesecake combines the tangy, protein-packed goodness of Greek yogurt with the vibrant, fruity joy of classic gelatin. It is light, refreshing, and guaranteed to become your new favorite go-to dessert for any occasion.
Why You’ll Love This Easy No-Bake Greek Yogurt Jello Cheesecake:
- No-Bake Simplicity: You can skip the oven entirely, making this the perfect recipe for hot summer days or when you need an oven-free solution. It saves you time and keeps your kitchen cool while delivering professional-grade results.
- Protein-Packed Ingredients: By incorporating Greek yogurt, this cheesecake offers a delightful tang while boosting the protein content of your dessert. It is a smarter way to enjoy a treat that feels indulgent without being overly heavy.
- Versatile Flavor Profiles: Because it relies on gelatin for its base, you can switch up the flavor simply by changing the jello variety. From zesty lime to classic strawberry, the possibilities are endless for your dessert table.
- Perfect Texture: This cheesecake achieves a mousse-like consistency that is incredibly smooth and velvety. Every bite melts in your mouth, providing a luxurious experience that guests will rave about.
- Make-Ahead Convenience: Since it requires chilling, this dessert is the ultimate make-ahead dish for parties or family gatherings. You can prepare it the day before, allowing you to relax while your dessert sets perfectly in the fridge.
- Impressive Presentation: The vibrant color and clean, smooth layers make this dish look stunning on any serving platter. It is a visual masterpiece that looks like it took hours to prepare, even though it is surprisingly effortless.
- Family-Friendly Appeal: Both kids and adults adore the sweet, fruity flavor and the soft, creamy texture of this cheesecake. It is a crowd-pleaser that fits perfectly into any dessert rotation throughout the year.
Ingredients Needed:
- ☐
1 1/2 cups graham cracker crumbs — use finely ground crumbs for a uniform crust
- ☐
1/2 cup unsalted butter, melted — ensure it is fully melted for better binding
- ☐
2 packages (8 oz each) cream cheese, softened — room temperature is key for smoothness
- ☐
1 cup plain Greek yogurt (full fat) — use full fat for the best texture
- ☐
1/2 cup granulated sugar — adjust sweetness to your preference
- ☐
2 teaspoons vanilla extract — adds a warm, aromatic depth
- ☐
1 box (3 oz) strawberry jello — or any favorite fruit flavor
- ☐
1 cup boiling water — must be hot to dissolve crystals
- ☐
1 cup cold water — use chilled water to help set the gel
- ☐
Fresh berries — for a beautiful, fresh garnish
Essential Equipment:
- 🔧 Springform pan — Essential for releasing the cheesecake cleanly without damaging the delicate sides.
- 🔧 Electric hand mixer — Makes quick work of whipping the cream cheese into a perfectly smooth, lump-free base.
- 🔧 Measuring cups — Ensures exact ratios for the crust and filling, which is critical for the setting process.
- 🔧 Silicone spatula — Perfect for scraping every bit of goodness from the bowl and smoothing the top of the cheesecake.
Recipe Overview:
🍳 Cook: 0 min
⏰ Total: 4 hr 20 min
👥 Serves: 8
📊 Difficulty: Easy
Step-by-Step Instructions:
Follow these simple steps to create a beautiful, delicious dessert that your entire family will enjoy.
Step 1: Preparing the Crust
-
○
In a medium bowl, combine graham cracker crumbs and melted butter, stirring until the mixture feels like wet sand and releases a warm, buttery, toasted aroma. -
○
Press the crumb mixture firmly into the bottom of a 9-inch springform pan, using the flat bottom of a measuring cup to ensure the crust is compact, uniform, and roughly 1/4 inch thick. -
○
Place the pan into the refrigerator to chill and firm up while you focus your attention on the creamy filling.
Step 2: Mixing the Creamy Base
-
○
In a large mixing bowl, beat the softened cream cheese on medium speed for two minutes until it reaches a smooth, velvety, and perfectly creamy consistency. -
○
Add the Greek yogurt, sugar, and vanilla extract, beating the mixture until it becomes light, fluffy, and completely free of any lumps. -
○
Taste a tiny amount of the mixture to ensure it has that signature tangy sweetness, confirming the sugar has fully dissolved into the creamy base.
Step 3: Preparing the Gelatin
-
○
Dissolve the strawberry jello powder in boiling water, stirring constantly for at least two minutes until the liquid is clear, vibrant, and completely free of any granules. -
○
Stir in the cold water, then allow the mixture to cool for 10 minutes until it feels neutral to the touch, ensuring it is no longer hot. -
○
With your mixer on low speed, slowly stream the jello mixture into the cream cheese base, blending until you have a smooth, pinkish, and pourable consistency.
Step 4: Setting and Serving
-
○
Pour the filling over the chilled crust, tapping the pan gently on the counter to release any trapped air bubbles and create a perfectly smooth surface. -
○
Refrigerate the cheesecake for at least 4 hours, checking for a firm top and a slight wobble in the center to ensure it has set properly. -
○
Run a thin knife around the edge to loosen the sides before releasing the springform, then top with fresh, bright berries before slicing cleanly into elegant, creamy wedges.
Tips for Success:
💡 Pro Tips
- ✔️ Use full-fat cream cheese and Greek yogurt for the creamiest texture; low-fat can lead to a slightly grainy mouthfeel.
- ✔️ Make sure the jello is fully dissolved before adding to the cream cheese mixture; otherwise, you’ll get gelatin lumps.
- ✔️ Chill the crust while making the filling to prevent it from becoming soggy.
- ✔️ Let the cream cheese come to room temperature before beating; this ensures a lump-free filling.
- ✔️ For a firmer set, use the full box of jello and follow the package instructions for a firmer gel, or add an extra tablespoon of cold water.
- ✔️ Always tap the pan on the counter after pouring the filling to ensure a perfectly flat, bubble-free surface.
Variations & Substitutions:
- 🔄 Berry Swirl: After pouring the filling, add small spoonfuls of fruit jam and swirl with a knife. This creates a beautiful marble effect and adds concentrated bursts of fruit flavor to every bite.
- 🔄 Citrus Zest: Add 1 tablespoon of lemon or orange zest to the filling for a fresh, aromatic twist. The citrus oils brighten the overall profile, balancing the richness of the cream cheese perfectly.
- 🔄 Chocolate: Use chocolate graham crackers and add 2 tablespoons of cocoa powder to the filling. This is a decadent choice for chocolate lovers who still enjoy the tang of a creamy cheesecake.
- 🔄 Mango-Coconut: Substitute mango jello and add 1/4 cup coconut flakes to the crust. This combination brings a tropical flair that feels like a vacation on a plate.
- 🔄 Peanut Butter: Beat in 1/2 cup of peanut butter with the cream cheese for a rich, nutty flavor. It adds body and a savory-sweet depth that pairs incredibly well with the graham cracker crust.
Serving Suggestions:
- 🍽️ Top with a dollop of fresh, lightly sweetened whipped cream for an added touch of luxury.
- 🍽️ Garnish with fresh mint leaves to contrast the vibrant red color and provide a cooling herbal note.
- 🍽️ Serve alongside a small bowl of mixed berries tossed in a little honey for extra freshness.
- 🍽️ Drizzle a thin line of berry reduction or fruit puree over each slice for a restaurant-quality presentation.
Health Benefits:
- 💚 High Protein: The addition of Greek yogurt significantly increases the protein content compared to traditional cheesecakes. Protein is essential for muscle repair and helps keep you feeling fuller for longer.
- 💚 Probiotic Potential: Greek yogurt contains beneficial probiotics that support gut health and digestion. Including fermented foods in your diet can contribute to a healthier microbiome.
- 💚 Calcium Source: Both yogurt and cream cheese are excellent sources of calcium, which is vital for maintaining strong bones and teeth. Getting your calcium through delicious desserts is a simple way to meet daily requirements.
- 💚 Portion Control: Because this recipe is rich and satisfying, you can enjoy a smaller slice and feel completely satisfied. This helps in maintaining a balanced approach to indulgence.
Nutrition Facts:
Storage & Reheating:
- ❄️ Fridge: Store in an airtight container for up to 5 days. Cover the top with plastic wrap or foil to prevent the cheesecake from drying out and absorbing other odors.
- 🧊 Freezer: Wrap the cheesecake (unwrapped) in two layers of plastic wrap and then a layer of foil. Freeze for up to 2 months, thawing it overnight in the refrigerator before serving.
- ♨️ Reheat: Not applicable – serve this dish cold. If you have frozen it, thaw in the fridge and let it sit at room temperature for 10 minutes before slicing for the best texture.

Frequently Asked Questions:
Can I use a different type of yogurt?
While you can experiment with other yogurts, full-fat Greek yogurt is highly recommended because of its thick, creamy texture and high protein content. Using thinner or non-Greek yogurts may result in a cheesecake that does not set properly and feels watery. Stick to full-fat varieties to ensure the most luxurious mouthfeel.
Why did my cheesecake not set?
The most common reasons for a cheesecake not setting are not dissolving the jello granules completely or not allowing enough chilling time in the refrigerator. Ensure you stir the jello into boiling water for at least two minutes until no granules remain. Additionally, the cheesecake needs at least four hours of undisturbed chilling to allow the gelatin to structure the filling correctly.
Can I make this dairy-free?
Creating a dairy-free version of this recipe is possible, but it requires specific substitutions like plant-based cream cheese and a dairy-free yogurt alternative. Note that these alternatives often have different water contents and may react differently with the gelatin. You might need to adjust the amount of gelatin or use a plant-based gelling agent like agar-agar for the best results.
How long will this stay fresh in the fridge?
This cheesecake will stay fresh and delicious for up to 5 days when stored properly in an airtight container. It is best to keep it covered to prevent the surface from drying out or absorbing other flavors from the refrigerator. If you notice any changes in texture or odor, it is best to discard it.
Is it possible to use a different crust?
Yes, you can absolutely customize the crust by using various types of cookies or crackers instead of graham crackers. Ginger snaps, digestive biscuits, or even vanilla wafers work wonderfully to create a unique base. Just ensure the ratio of crumbs to melted butter remains consistent so that the crust holds together when you slice it.
More Delicious Dishes:
- 🍴 Greek Marinated Chicken — A savory, herb-infused meal that is perfect for a balanced dinner before enjoying this light dessert.
- 🍴 Greek Orzo Pasta Salad — A bright and refreshing side dish that pairs beautifully with the creamy notes of a no-bake cheesecake.
- 🍴 Easy Mediterranean Sides — Explore more ways to bring fresh, vibrant flavors into your kitchen with these simple and quick recipes.
Conclusion:
This Easy No-Bake Greek Yogurt Jello Cheesecake is the ultimate solution for those busy days when you crave something special without the stress. Its creamy texture and refreshing flavor make it an instant hit with guests and family alike. By using simple ingredients and a little bit of patience, you can create a dessert that looks and tastes like a masterpiece. Follow us on Pinterest for more delicious recipes!
Easy No-Bake Greek Yogurt Jello Cheesecake
Ingredients
Equipment
Method
- Combine graham cracker crumbs and melted butter in a medium bowl until the texture resembles wet sand.
- Press the crumb mixture firmly into the bottom of a 9-inch springform pan and chill in the refrigerator.
- Beat the softened cream cheese in a large bowl until smooth and creamy.
- Add Greek yogurt, sugar, and vanilla extract; beat until well combined and fluffy.
- Dissolve the jello powder in boiling water, stirring for at least 2 minutes.
- Stir in the cold water and let the mixture cool for 10 minutes.
- Gradually pour the jello mixture into the cream cheese mixture while mixing on low speed.
- Pour the filling over the chilled crust and tap the pan to release air bubbles.
- Refrigerate for at least 4 hours until set.
- Run a thin knife around the edge to release the springform and garnish with fresh berries before serving.
