
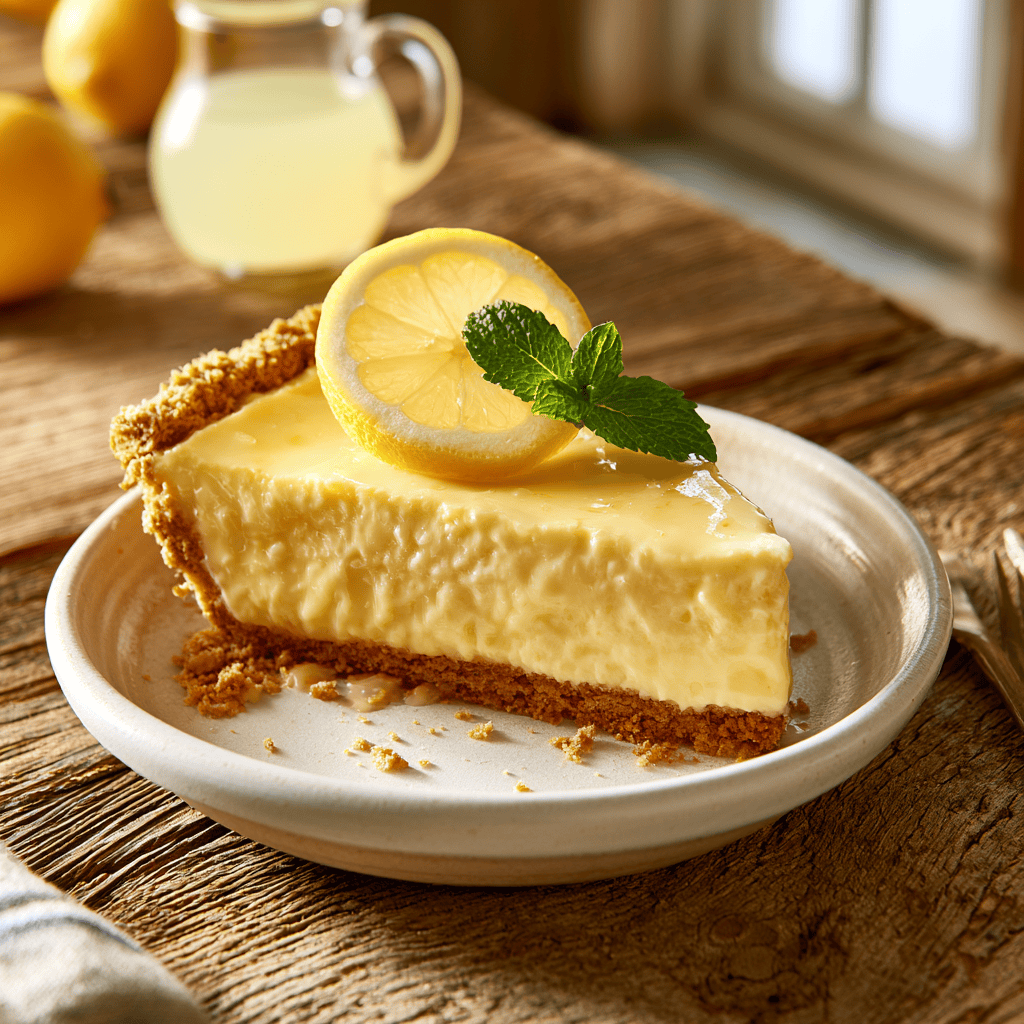
Refreshing No-Bake Lemon Icebox Pie
Golden and crispy on the outside, with a velvety, sunshine-yellow center that melts on your tongue, this Refreshing No-Bake Lemon Icebox Pie is the ultimate dessert for warm weather gatherings. The bright, zesty punch of fresh citrus perfectly balances the rich, creamy texture of the filling, all anchored by a buttery, toasted graham cracker crust. It is a masterpiece of simplicity that requires zero oven time, making it the perfect treat to keep your kitchen cool while delivering professional-grade flavor.
Why You’ll Love This Refreshing No-Bake Lemon Icebox Pie:
- Zero Oven Required: This recipe is a lifesaver during hot summer days when turning on the oven is the last thing you want to do. You can achieve a decadent, restaurant-quality dessert entirely in your refrigerator.
- Quick Preparation Time: With only a handful of minutes spent mixing and pressing, this pie comes together faster than almost any other dessert. It is the ideal solution for last-minute hosting or spontaneous sweet cravings.
- Perfect Texture Contrast: The combination of a crunchy, buttery graham cracker base against the smooth, custard-like filling creates a delightful experience in every bite. It is a sophisticated balance of textures that never gets old.
- Bright Citrus Flavor: Using fresh lemon juice and zest ensures a vibrant, natural tang that awakens the palate. It avoids the artificial aftertaste found in pre-packaged mixes, offering a clean and refreshing finish.
- Make-Ahead Convenience: Because this pie needs time to set in the fridge, it is practically designed to be made a day in advance. You can cross dessert off your to-do list early, leaving you stress-free when guests arrive.
- Customizable Ingredients: The base recipe is a canvas for your creativity, allowing you to easily experiment with different citrus fruits or garnishes. It adapts beautifully to various seasonal additions without losing its structural integrity.
- Crowd-Pleasing Appeal: Lemon desserts are universally loved for their ability to cleanse the palate after a savory meal. This pie is consistently a hit at potlucks, family reunions, and intimate dinner parties alike.

Ingredients Needed:
- ☐
2 cups (480 ml) heavy cream — use chilled cream for best volume
- ☐
2 cups (400 g) sweetened condensed milk — from 2 cans, 14 oz each
- ☐
1 cup (240 ml) fresh lemon juice — about 6-8 lemons
- ☐
1 tablespoon (15 g) lemon zest — from about 2 lemons
- ☐
1 ½ cups (180 g) graham cracker crumbs — about 12 full sheets
- ☐
½ cup (115 g) unsalted butter — melted
- ☐
¼ cup (50 g) granulated sugar — for the crust
- ☐
1 teaspoon (5 ml) vanilla extract — enhances the creaminess
- ☐
Garnish lemon slices, fresh mint leaves — optional
Essential Equipment:
- 🔧 9-inch Pie Dish — Provides the perfect depth and structure for this no-bake recipe.
- 🔧 Large Mixing Bowl — Essential for combining the heavy cream and citrus without splashing.
- 🔧 Whisk or Hand Mixer — Necessary to achieve the thick, custard-like consistency of the filling.
- 🔧 Measuring Cups — Ensures accurate ratios for the perfect balance between crust and filling.
- 🔧 Rubber Spatula — Perfect for folding ingredients and smoothing the top of the pie for a professional finish.
Recipe Overview:
🍳 Cook: 0 min
⏰ Total: 6 hr 15 min
👥 Serves: 8
📊 Difficulty: Easy
Step-by-Step Instructions:
Follow these simple steps to create a refreshing dessert that will impress every guest at your table.
Step 1: Preparing the Crust
- ○ In a medium bowl, combine the graham cracker crumbs, melted butter, and sugar. The mixture should smell buttery and resemble wet sand as it holds together perfectly when pressed between your fingers.
- ○ Press the crumb mixture firmly into the bottom and up the sides of a 9-inch pie dish. Use the bottom of a measuring cup to compact it evenly for a sturdy foundation, then place it in the refrigerator to chill while you prepare the filling.
- ○ While the crust firms up, ensure your workspace is clean, allowing the scent of the toasted graham crackers to set the stage for the vibrant citrus notes to follow.
Step 2: Creating the Filling
- ○ In a large mixing bowl, combine the heavy cream, sweetened condensed milk, fresh lemon juice, lemon zest, and vanilla extract. You will immediately notice a refreshing citrus aroma filling the air.
- ○ Whisk vigorously for about 2 minutes until the mixture is smooth and begins to thicken. It should take on a beautiful, pale yellow color while maintaining a velvety, creamy consistency.
- ○ Continue whisking until the mixture achieves the texture of a soft, luxurious custard that clings slightly to the whisk.
Step 3: Assembly and Chilling
- ○ Once the mixture has reached the desired consistency, pour it carefully into the chilled crust. Use a spatula to spread it evenly, ensuring the filling reaches the edges for a clean look.
- ○ Tap the pie dish gently on the counter to release any trapped air bubbles, leaving the surface glossy and perfectly smooth.
- ○ Cover the pie with plastic wrap, ensuring the wrap touches the surface gently to prevent a skin from forming while it rests in the refrigerator for at least 6 hours.
Step 4: Finishing Touches
- ○ Just before serving, slice thin, bright yellow lemon rounds. Pat them dry with a paper towel to remove excess moisture for a pristine garnish.
- ○ Run a clean knife under hot water and dry it before slicing the pie. This simple trick melts the edges of the filling just enough to ensure a clean, beautiful cut through the buttery crust.
- ○ Slice the pie into 8 even pieces, garnish with your prepared lemon twists or fresh mint, and serve immediately to enjoy the cool, tangy filling and crisp crust.
Tips for Success:
💡 Pro Tips
- ✔️ Use fresh lemon juice for the best flavor; bottled lemon juice has a flat taste that simply cannot compete with the vibrancy of freshly squeezed fruit.
- ✔️ Zest the lemons before juicing, and make sure to remove only the yellow part, not the white pith, which is bitter and can ruin the delicate balance of your pie.
- ✔️ Chill your mixing bowl and whisk in the freezer for 10 minutes before whipping the cream; it will whip faster and hold its volume much better.
- ✔️ When pressing the crust, use a flat-bottomed glass to create an even, compact layer, which prevents crumbling when you slice into the finished pie.
- ✔️ Allow the pie to chill for a full 8 hours or overnight; this patience ensures the filling sets perfectly and allows you to achieve clean, professional-looking slices.
- ✔️ Always ensure your butter is fully melted but slightly cooled before mixing with the crumbs, as this ensures the most uniform distribution and a perfect crunch.
Variations & Substitutions:
- 🔄 Lime Icebox Pie: Substitute the lemon juice and zest with lime juice and zest for a punchy, tropical twist. Add a drop of natural green food coloring if you desire a vibrant, classic lime look.
- 🔄 Berry Swirl Icebox Pie: After pouring the filling into the crust, drop tablespoons of your favorite berry jam, such as raspberry or blueberry, onto the surface. Use a knife to create elegant swirls before chilling.
- 🔄 Coconut Lemon Pie: Add ½ cup of toasted shredded coconut to the crust mixture to provide an extra nutty crunch. You can also fold ¼ cup of toasted coconut into the filling for a lovely texture.
- 🔄 Mint Lemon Pie: Add 1 teaspoon of high-quality mint extract to the filling for a cooling sensation. Garnish with plenty of fresh mint leaves to highlight the refreshing flavor profile.
- 🔄 No-Graham Crust: Replace the graham cracker crumbs with crushed vanilla wafers or shortbread cookies for a buttery, slightly sweeter alternative. Both options pair beautifully with the tangy lemon filling.
Serving Suggestions:
- 🍽️ Serve each slice with a small dollop of lightly sweetened whipped cream to add extra decadence.
- 🍽️ Pair the pie with a glass of sparkling water infused with fresh lemon and mint for a sophisticated, refreshing dessert course.
- 🍽️ Arrange fresh berries like raspberries or blueberries around the plate to add a pop of color and natural sweetness.
- 🍽️ For an elegant presentation, dust the plate lightly with a tiny bit of powdered sugar before placing the slice down.
Health Benefits:
- 💚 Vitamin C Boost: Fresh lemons are an excellent source of Vitamin C, which is essential for supporting a healthy immune system. Incorporating fresh citrus into your diet can help promote overall vitality.
- 💚 Digestive Support: Lemon juice is often associated with aiding digestion and cleansing the palate. Enjoying a small slice after a meal is a traditional way to feel refreshed and balanced.
- 💚 Mood Elevation: The bright, clean scent of fresh lemon zest is known to be uplifting and energizing. This sensory experience adds a layer of mental well-being to your dessert ritual.
- 💚 Portion Control: Because this pie is rich and satisfying, a single 1/8th slice is usually enough to satisfy a sweet craving. It encourages mindful eating by focusing on quality and flavor intensity.
Nutrition Facts:
Storage & Reheating:
- ❄️ Fridge: Store the pie in the refrigerator, tightly covered with plastic wrap or in an airtight container, for up to 3 days to maintain freshness.
- 🧊 Freezer: You can freeze the pie (without garnish) for up to 2 months. Wrap the pie dish tightly with plastic wrap and then a layer of aluminum foil to prevent freezer burn. Thaw in the refrigerator overnight before serving.
- ♨️ Reheat: This is a no-bake icebox pie; it should be served cold. Do not reheat, as the filling will lose its structure and texture.

Frequently Asked Questions:
Can I use bottled lemon juice for this recipe?
While you can use bottled lemon juice in a pinch, it is highly recommended to use fresh lemons for the best flavor. Bottled juice often contains preservatives and lacks the bright, vibrant acidity that defines a true icebox pie. The zest from fresh lemons also adds aromatic oils that bottled juice simply cannot provide.
Why is my filling not setting properly?
The filling may not set if it hasn’t been chilled for the full recommended time or if it wasn’t whisked long enough to thicken. Ensure you whisk the heavy cream and citrus mixture for the full 2 minutes as instructed to activate the thickening process. If you are in a rush, place the pie in the coldest part of your refrigerator to ensure it sets firmly.
Can I make this pie ahead of time?
Yes, this pie is actually best when made ahead of time. It requires a significant chilling period of at least 6 hours, so preparing it the day before is ideal. This allows the flavors to meld together and the structure to firm up perfectly for beautiful, clean slices.
How do I get clean slices without the crust crumbling?
The secret to clean slices is running your knife under hot water and drying it between each cut. The heat from the blade melts the filling slightly as you slice, preventing the crust from dragging or pulling apart. Additionally, using a flat-bottomed glass to pack the crust tightly during preparation helps keep the base secure.
What if I don’t have a 9-inch pie dish?
If you don’t have a 9-inch pie dish, you can use a slightly smaller or larger dish, though it will affect the thickness of the pie. A smaller dish will result in a thicker, taller slice, while a larger dish will create a thinner, flatter pie. Just ensure the dish you choose is deep enough to hold the volume of the filling comfortably.
More Delicious Dishes:
- 🍴 Lemon Chicken with Orzo — A savory, citrus-infused meal that perfectly complements your lemon dessert theme.
- 🍴 Soft and Chewy Lemon Sugar Cookies — Delightfully bright cookies that are perfect for lemon lovers who enjoy a soft, buttery treat.
- 🍴 Pumpkin Pie Crisp with a Buttery Crust — A comforting, warm alternative for those who enjoy the texture of a crisp and a rich, buttery crust.
Conclusion:
This Refreshing No-Bake Lemon Icebox Pie is the perfect way to conclude any meal with a bright, zesty, and cool finish. Its simple preparation and sophisticated flavor profile make it a must-have recipe in your culinary repertoire. We hope you enjoy making this crowd-pleasing dessert as much as we do. Follow us on Pinterest for more delicious recipes!
Refreshing No-Bake Lemon Icebox Pie
Ingredients
Equipment
Method
- Combine graham cracker crumbs, melted butter, and sugar in a bowl until the mixture resembles wet sand.
- Press the mixture firmly into the bottom and up the sides of a 9-inch pie dish and chill in the refrigerator.
- Whisk heavy cream, sweetened condensed milk, lemon juice, lemon zest, and vanilla extract in a large bowl for 2 minutes until thickened.
- Pour the filling into the crust and smooth the top with a spatula.
- Tap the dish on the counter to remove air bubbles and cover with plastic wrap.
- Refrigerate for at least 6 hours or overnight until set.
- Slice with a clean, hot knife and garnish with lemon rounds and mint before serving.
