

Crispy Dill Pickle Ranch Smash Chicken Tacos
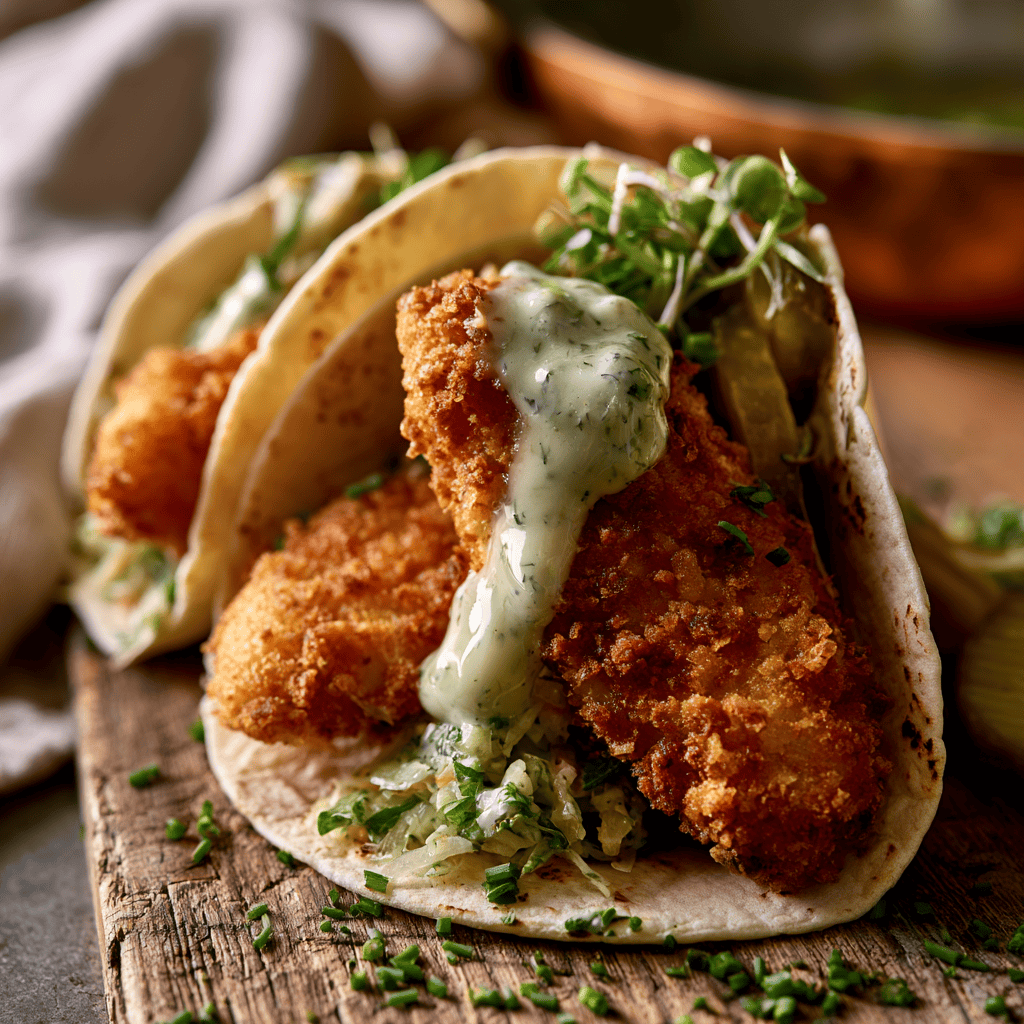
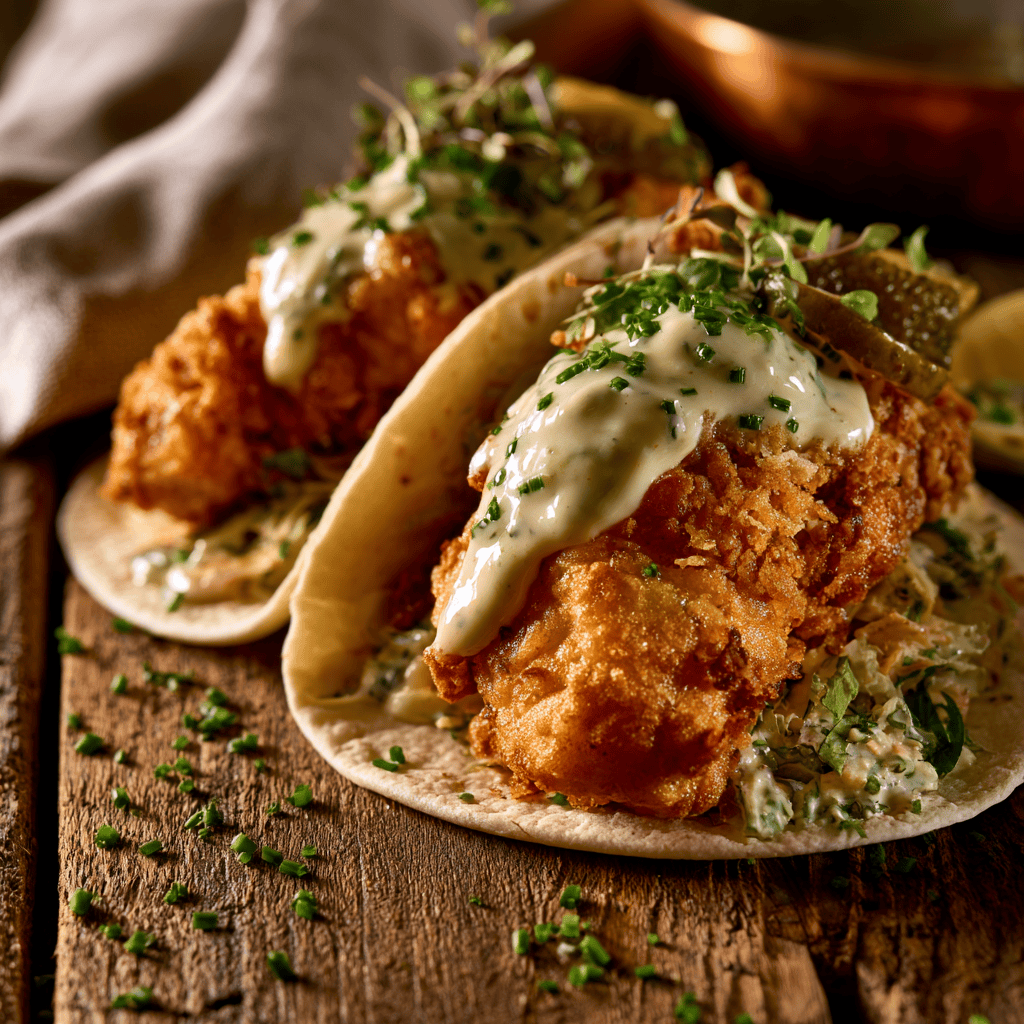
Golden and crispy on the outside, these Crispy Dill Pickle Ranch Smash Chicken Tacos are the ultimate weeknight comfort food. The secret lies in the tangy pickle brine marinade, which infuses the chicken with deep flavor while keeping it incredibly succulent. When paired with a zesty, homemade dill ranch sauce and tucked into warm, soft tortillas, each bite offers a perfect contrast of textures. You will find yourself craving this vibrant, restaurant-quality meal again and again.
Why You’ll Love This Crispy Dill Pickle Ranch Smash Chicken Tacos Recipe
- Flavor Explosion: The pickle brine marinade ensures every bite of chicken is perfectly seasoned and tangy. It provides a unique depth of flavor that elevates standard fried chicken to a gourmet level.
- Unbeatable Crunch: Using panko breadcrumbs mixed with savory spices creates a shatteringly crisp crust that stays crunchy even after adding toppings. You get that satisfying sound and feel with every single bite.
- Creamy Homemade Sauce: The signature dill ranch sauce is simple to whip up and ties all the components together. Its refreshing, herbaceous profile balances the richness of the fried chicken.
- Kid-Friendly Appeal: This recipe is a massive hit with younger eaters who love the combination of crispy chicken and familiar ranch flavors. It is a fantastic way to introduce new textures in a fun, taco-based format.
- Customizable Toppings: You can easily adapt these tacos to suit your preferences with extra pickles, fresh veggies, or even a splash of heat. Everyone at the table can assemble their own perfect taco just the way they like it.
- Quick Preparation: Despite the gourmet result, the actual cooking time is relatively short, making it perfect for busy weeknights. You can prep the chicken ahead of time to save even more effort when dinner hour arrives.
- Versatile Serving: These tacos work just as well for a casual game day snack as they do for a full family sit-down dinner. They look beautiful on the plate and taste even better than they look.
Ingredients Needed
- ☐
4 boneless, skinless chicken breasts (about 1.5 lb / 680g), butterflied and pounded to 1/2-inch thickness — use a meat mallet for even thickness
- ☐
1 cup (240ml) pickle brine — save it from your favorite jar
- ☐
1 cup (120g) all-purpose flour — standard pantry staple
- ☐
2 large eggs, beaten (50g each) — whisk thoroughly
- ☐
2 cups (100g) panko breadcrumbs — for that extra crunch
- ☐
1 tablespoon (15g) ranch seasoning mix — adds savory depth
- ☐
1 teaspoon (5g) garlic powder — aromatic base
- ☐
1 teaspoon (5g) onion powder — flavor enhancer
- ☐
1/2 teaspoon (2.5g) black pepper — freshly cracked is best
- ☐
1/2 teaspoon (2.5g) salt — adjust to preference
- ☐
1/2 cup (120g) mayonnaise — for the creamy base
- ☐
3 tablespoons (45g) sour cream — adds tangy richness
- ☐
2 tablespoons (30g) dill pickle relish — the key to the ranch flavor
- ☐
1 teaspoon (5g) fresh dill, chopped — fresh is best for color
- ☐
1/2 teaspoon (2.5g) dried dill — concentrated herb flavor
- ☐
1/2 teaspoon (2.5g) lemon juice — brightens the sauce
- ☐
8 small flour tortillas (6-inch) — warmed before serving
- ☐
1 cup (150g) shredded lettuce — crisp iceberg or romaine
- ☐
1 cup (150g) diced tomatoes — fresh and juicy
- ☐
1/2 cup (75g) sliced pickles — for the ultimate crunch
- ☐
2 tablespoons (30ml) vegetable oil, for frying — high smoke point oil
Essential Equipment
- 🔧 Meat Mallet: Essential for pounding the chicken to a uniform thickness, ensuring it cooks evenly without drying out.
- 🔧 Cast Iron Skillet: The gold standard for frying; it holds heat exceptionally well, leading to a superior, crispy crust.
- 🔧 Digital Thermometer: Necessary to ensure your oil is at the perfect temperature and that your chicken reaches a safe internal heat.
- 🔧 Wire Cooling Rack: Prevents the bottom of your fried chicken from steaming and losing its crunch while you finish frying the rest.
Recipe Overview
🍳 Cook: 10 min
⏰ Total: 260 min
👥 Serves: 4
📊 Difficulty: Easy
Step-by-Step Instructions
Follow these instructions carefully to achieve the perfect balance of tangy flavor and satisfying crunch in your Crispy Dill Pickle Ranch Smash Chicken Tacos.
Step 1: The Flavor Infusion
- ○In a large shallow dish, pour the pickle brine and add the chicken breasts. Ensure the chicken is fully submerged, adding a little water if needed. Cover and refrigerate for at least 4 hours or overnight. The chicken will absorb a salty, tangy flavor and its aroma will hint at dill and vinegar.
- ○After marinating, remove the chicken from the brine and pat completely dry with paper towels. The surface should feel tacky, not wet, to help the breading stick properly.
- ○Set up a breading station: in three separate shallow bowls, place the flour, beaten eggs (seasoned with a pinch of salt), and a mixture of panko breadcrumbs, ranch seasoning, garlic powder, onion powder, black pepper, and salt. Stir the dry mixture until the herbs are evenly distributed, releasing a fragrant, herby smell.
Step 2: Creating the Crunch
- ○Dredge each chicken piece in the flour, shaking off any excess. Then dip into the egg wash, letting any drips fall back into the bowl. Finally press firmly into the panko mixture, ensuring an even, thick coating. The coating should feel gritty and adhere completely to the chicken surface.
- ○Heat the oil in a large skillet over medium-high heat. When the oil shimmers and a pinch of breadcrumbs sizzles immediately, reduce the heat to medium.
- ○Gently lay the chicken into the skillet, being careful not to overcrowd. You may need to work in batches. The oil should bubble actively around the chicken, producing a gentle hiss as the crust begins to fry to a perfect golden color.
Step 3: Achieving Golden Perfection
- ○Cook for 4-5 minutes per side without moving, until the underside is deep golden brown and crusty. Use tongs to lift a corner: the crust should be crisp and rich in color.
- ○Flip carefully with a spatula to preserve the crust, and cook the other side for another 4-5 minutes, until the internal temperature reaches 165°F (74°C) and the crust appears crackled and bronzed.
- ○Transfer the crispy chicken to a wire rack set over a baking sheet to drain. The crust will crisp further as it cools, and you’ll hear a faint, appetizing crackle.
Step 4: Assembly and Serving
- ○In a small bowl, whisk together the mayonnaise, sour cream, pickle relish, fresh dill, dried dill, and lemon juice. Season with a pinch of salt and pepper. The dipping sauce will be creamy, tangy, and flecked with green dill; adjust lemon juice to your taste.
- ○Warm the tortillas in a dry skillet over medium heat for 20-30 seconds per side, or until soft and pliable. They should be slightly toasted and fragrant.
- ○To assemble, spread a generous spoonful of the dill ranch sauce on each tortilla. Top with shredded lettuce, diced tomatoes, and sliced pickles. Slice the crispy chicken into strips and place it over the toppings. Fold and serve immediately, so the crust remains shatteringly crisp.
Tips for Success
💡 Pro Tips
- ✔️ Ensure the chicken is thoroughly dried after marinating; excess moisture will create steam and prevent crisping.
- ✔️ Use a thermometer to maintain oil temperature around 350°F (175°C) for even cooking and a crunchy crust that doesn’t absorb oil.
- ✔️ Press the panko firmly onto the chicken; any loose crumbs will fall off during frying.
- ✔️ Let the breaded chicken rest for 10 minutes before frying; this helps the coating adhere better.
- ✔️ For extra crispiness, double-dip: after the first egg wash and panko, dip again in egg and panko for a thicker crust.
- ✔️ Serve immediately after assembly so the moisture from the lettuce and sauce doesn’t soften the breading.
Variations & Substitutions
- 🔄 Spicy Pickle Ranch: Add 1 teaspoon cayenne pepper and 1 tablespoon hot sauce to the egg wash for a fiery kick. This adds a nice contrast to the tanginess of the pickle brine.
- 🔄 Cheesy Filling: Mix 1/2 cup shredded cheddar into the breadcrumb mixture for a crispy cheese crust. This creates a savory, salty layer that pairs beautifully with the ranch sauce.
- 🔄 Lower Carb: Serve the crispy chicken over a large lettuce wrap instead of tortillas. This keeps the meal light while still providing all the crunch and flavor of the original taco.
- 🔄 Air Fryer: Instead of shallow frying, spray breaded chicken with oil and air fry at 400°F (200°C) for 12-15 minutes, flipping halfway. This is a great way to reduce oil intake without sacrificing the crispiness.
- 🔄 Sweet & Tangy: Replace the dill pickle relish with a sweet pickle relish for a different flavor of sweetness and tang. This variation is especially popular with children and those who prefer a milder profile.
Serving Suggestions
- 🍽️ Serve with a side of crispy seasoned potato wedges to complement the crunch of the chicken.
- 🍽️ Offer lime wedges on the side for guests to squeeze over their tacos, brightening the overall flavor.
- 🍽️ Arrange a taco bar with bowls of extra pickles, cilantro, and diced red onion for a customizable experience.
- 🍽️ Pair with a refreshing cucumber salad to add a cool element that balances the heat of the fried chicken.
Health Benefits
- 💚 High Protein: Each serving provides 42g of protein, which is essential for muscle repair and keeping you feeling full longer. This makes the meal a great post-workout option.
- 💚 Probiotic Potential: The use of pickle brine, if from fermented pickles, can introduce beneficial bacteria to your diet. These probiotics support a healthy gut microbiome and overall digestion.
- 💚 Rich in Herbs: The use of fresh and dried dill provides small amounts of antioxidants. These plant compounds help combat oxidative stress in the body.
- 💚 Balanced Nutrition: With a good mix of protein, fiber, and healthy fats, these tacos offer a more balanced meal profile than traditional fast-food fried chicken options.
Nutrition Facts
Storage & Reheating
- ❄️ Fridge: Store the crispy chicken and toppings separately in airtight containers. The chicken will keep for up to 4 days, but the crispy coating may soften. Keep the sauce and toppings in the fridge as well.
- 🧊 Freezer: Freeze the cooked and cooled crispy chicken strips in a single layer on a baking sheet, then transfer to a zip-top bag. Store for up to 3 months. Thaw in the refrigerator overnight.
- ♨️ Reheat: For best crispiness, reheat the chicken in a preheated oven at 375°F (190°C) for 10-12 minutes. Avoid microwaving as it makes the coating soggy and loses the texture.
Frequently Asked Questions
Can I use chicken thighs instead of breasts?
Yes, you can absolutely use boneless, skinless chicken thighs for this recipe. Thighs are generally more forgiving and stay juicier during the frying process. Just ensure you pound them to a similar 1/2-inch thickness so they cook at the same rate as the breasts.
How do I prevent the breading from falling off?
The key is to ensure the chicken is patted completely dry after marinating. If the surface is wet, the flour will clump and the egg wash won’t adhere properly. Additionally, pressing the breadcrumbs firmly onto the chicken ensures they are embedded into the coating, which helps them stay put during frying.
Can I make the marinade ahead of time?
The marinating process is vital for the flavor, so you can certainly keep the chicken in the brine for up to 24 hours. Longer than that may cause the texture of the chicken to change due to the acidity of the vinegar in the brine. Just make sure to keep the container well-covered in the refrigerator.
Why did my chicken get soggy after a few minutes?
Soggy chicken is usually caused by stacking the hot, fried pieces on top of each other, which traps steam. Always place your fried chicken on a wire rack so air can circulate underneath it. Also, avoid adding the cold toppings to the chicken until the very last second before you eat.
Is it possible to bake this chicken instead of frying it?
Yes, you can bake the breaded chicken in a 400°F (200°C) oven for about 20-25 minutes, flipping halfway through. For the best results, place the chicken on a wire rack over a baking sheet to ensure heat reaches the bottom. While not quite as crispy as frying, it is a healthier alternative that still yields a delicious result.
More Delicious Dishes
- 🍴 Chicken Spaghetti Recipe — A classic, comforting pasta dish that is perfect for feeding a crowd and satisfying those cheesy cravings.
- 🍴 Coconut Chicken Recipe — Enjoy a tropical twist on crispy chicken that pairs perfectly with sweet dipping sauces.
- 🍴 Best Chicken Salad Recipe — A refreshing and protein-packed salad that is ideal for light lunches or meal prep throughout the week.
Conclusion
These Crispy Dill Pickle Ranch Smash Chicken Tacos are sure to become a staple in your home. With their blend of tangy pickle flavor, crunchy panko crust, and creamy ranch sauce, they offer a dining experience that is both fun and
Crispy Dill Pickle Ranch Smash Chicken Tacos
Ingredients
Equipment
Method
- Submerge chicken in pickle brine in a shallow dish, cover, and refrigerate for at least 4 hours.
- Remove chicken from brine and pat completely dry with paper towels.
- Set up a breading station with flour, beaten eggs, and a mixture of panko, ranch seasoning, garlic powder, onion powder, pepper, and salt.
- Dredge each piece in flour, dip in egg wash, and press firmly into the panko mixture.
- Heat oil in a large skillet over medium heat.
- Fry chicken for 4-5 minutes per side until deep golden brown and the internal temperature reaches 165°F.
- Transfer chicken to a wire rack to drain.
- Whisk together mayonnaise, sour cream, relish, fresh and dried dill, and lemon juice in a small bowl.
- Warm tortillas in a dry skillet for 20-30 seconds per side.
- Assemble tacos by spreading sauce on tortillas, then adding lettuce, tomatoes, sliced pickles, and crispy chicken strips.
